I know I should have written this before Fourth of July, but this will have to serve as a Flashback Friday. 🙂 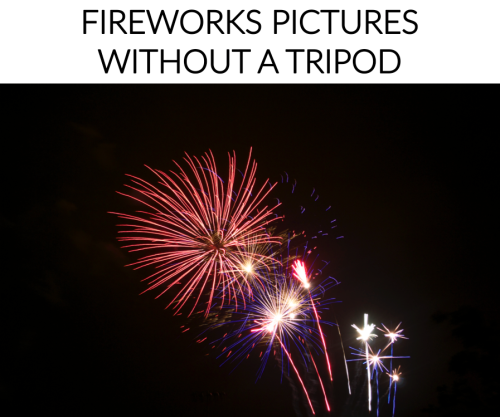 A quick Pinterest search will find one in a plethora of guides on how to take the best fireworks pictures. Undoubtedly, fireworks are one of the hardest subjects to photograph because of the nighttime setting, speed in which they explode up into the sky, bright lights they emit, etc. Therefore, the cardinal rule of fireworks photography is to invest in a tripod. While I could easily find a cheap one, I’m the kind of person who doesn’t like to invest in something I will only use sparingly. Since I rarely take pictures at night to begin with and I’m pretty good with holding my camera in the daytime, the only time I would utilize the tripod would be during Fourth of July (and I guess New Year’s too, but I’ve never taken New Year’s fireworks pictures before). My life without a tripod faced a challenge this past Fourth of July weekend when I attended two fireworks displays: Market Street Allen USA Celebration in Allen, Texas and Kaboom Town in Addison, Texas. Fortunately with my knowledge of digital photography and a bit of luck, I was still able to shoot professional-looking fireworks photos. So what if you’re cheap like me or you simply forget to bring your tripod to your local fireworks display? (This is assuming you already own a DSLR camera. I haven’t owned a nonprofessional camera in years, but I highly doubt you can take an amazing looking fireworks picture with that kind of camera. There’s no manual focus, aperture, ISO, etc., all of which are imperative to taking any light photography.)
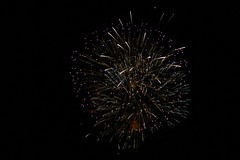
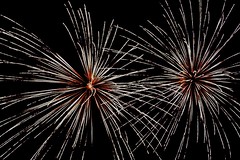
- Find a location without any obstructions. This would probably be the second cardinal rule of fireworks photography, tripod or not. Make sure there are no outside lights, electrical posts, or people in the way of your shot.
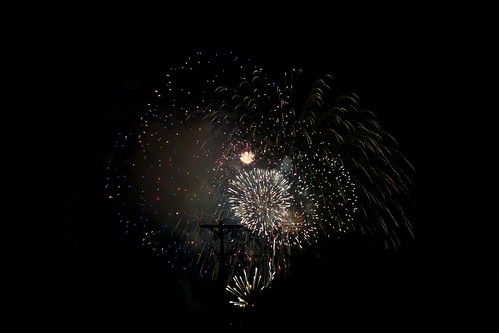
You can faintly see the outlines of an electrical post and some trees.
- Turn your flash off. This rule and the following three rules don’t change for light photography, even when you don’t have a tripod.
- Shoot on manual focus. If I kept my focus in automatic, my Nikon D3100 camera wouldn’t even shoot because it cannot focus on the fast-moving fireworks on a dark background.
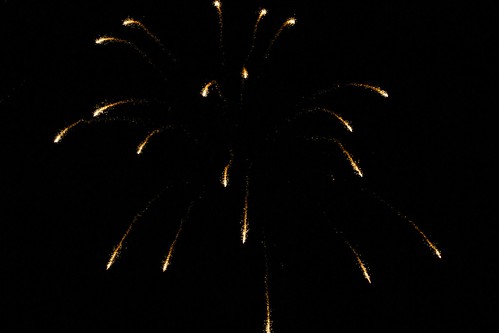
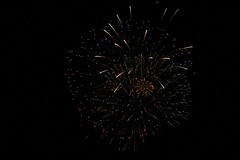
- Focus in on the fireworks. This may be a given, but these temporary explosions in the sky make focusing a bit more difficult. Zoom in as much as you can into the fireworks and adjust your manual focus until the fireworks are sharp. Then don’t move from your current position or risk having to readjust all over again. Actually, you probably don’t need to zoom back out since you’re most likely going to be positioned far back from the fireworks.
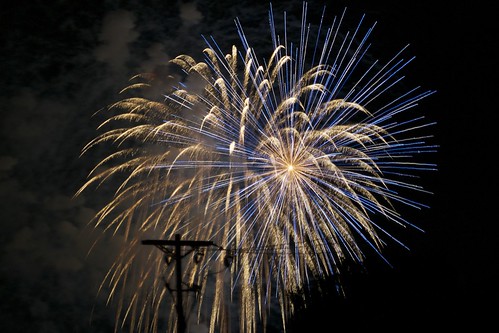
This picture may look focused, but if you click the link and zoom in closely, it’s slightly out of focus.
- Adjust your ISO to its lowest setting. To be honest, I can’t tell you off the top of my head what ISO stands for. What’s important to know is that the higher the ISO number, the more sensitive your camera is to light. The reason why your ISO should be at its lowest setting is so your picture will only highlight the fireworks and keep your background dark; fireworks are bright enough already without any additional camera settings help.
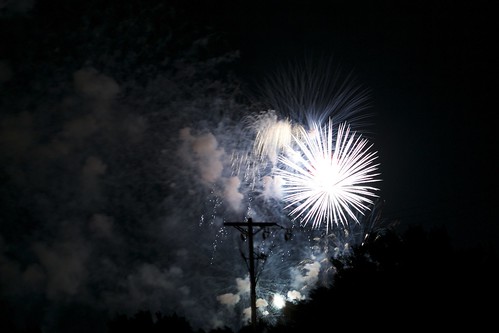
Even on an ISO of 100, my camera was still sensitive to the light that it even picked up the light reflecting from the smoke.
- Do whatever to your white balance. I just kept my white balance on auto. I didn’t play around with that setting, yet my pictures still came out the way I wanted them to anyway. If you find that adjusting it is best for you, then more power to you.
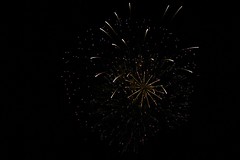
- Set your shutter speed to nothing slower than 1/20. In typical light photography, you can easily set your shutter speed to go on forever in bulb, place it on your tripod, and worry not about shaky hands. One-sentence anecdote: I began to take photography seriously when I enrolled in my college’s digital photography class. My instructor told me that without a tripod, the slowest shutter speed in which to set one’s camera while holding it is 1/20 in order to take a non-blurry picture. You can adjust it faster if you want, but you’ll probably only get small glimpses of light in your shot.
With a shutter speed of 1/20, I only get a fraction of a second of light exposed from a firework.
- If you are able to sit down and/or find a stationary object, you can slow your shutter speed even more. You’re gonna need a bit of luck and some non-caffeinated drinks, too, while you’re at it. By setting my shutter speed as low as 1″, I luckily was able to get a few fireworks photos without a hint of blurriness.
I actually took this long exposure picture standing up!
- Adjust your aperture accordingly. They say, “The slower the shutter speed, the greater the f-stop,” and vice versa. I actually set my aperture at f5.6 when I used both the 1/20 and 1″ shutter speed and ended up with amazing pictures in both sets. You’re shooting a special kind of photography so you can break the conventional rules.
- Ignore whatever your light meter says. Speaking of breaking traditional camera rules, ignore that your light meter is telling you that you’re underexposed.
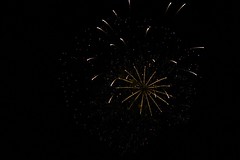
- Point and click and adjust when necessary. I’d recommend shooting with the relatively “fast” 1/20 shutter speed when there are many fireworks exploding in the sky. This way, you can take the shot right at the fireworks’ picture perfect moment. If you’re brave and decide to shoot with a slower shutter speed, hit the shutter button right when a firework is about to shoot up. That way, you can end with a beautiful light trail of the firework’s execution. If all else fails, set your camera on burst, hold down the shutter button as long as you can, and hold your camera steady for dear life.
This picture was taken with a 1/20 shutter speed during the finale of the Market Street Allen USA Celebration.
This picture of a single firework’s light trail was taken with a 1″ shutter speed.
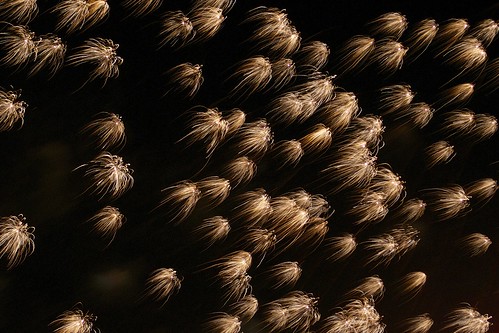
A sequence of fireworks shot in burst mode.
After the fireworks show:
- You’re going to delete a lot photos, especially if this is your first time taking fireworks pictures, especially without a tripod. There’s a reason why the camera experts recommend investing in a tripod, but it’s okay to make do with what you have. The trick is to take many pictures even if you think they will turn out horrible. That way, if you end up deleting a lot, you’ll still end up with plenty of good pictures. Sometimes, when you eventually look at your pictures on your computer, some pictures you thought looked bad in the viewfinder end up looking great, especially with editing (unfortunately, this also happens vice versa).
- But you’re hardly going to have to edit your photos. Whether shooting in the daytime or nighttime, as an amateur photographer, the perfect shot is one I don’t have to edit. Fireworks may be hard to photograph, but getting the picture perfect is worth it; the background is pitch black, the fireworks are bright and filled with saturation. For a few of the pictures I took this past Fourth of July weekend, I did mess around in iPhoto (again, I’m too cheap/probably won’t utilize Lightroom). I started off with the automatic enhance. If you’re a photo snob, I know what you’re going to say about auto enhance, but this time, it really did my fireworks photos justice. Then after, I’d recommend only adjusting exposure, saturation, and shadows. I sometimes fiddled around with the black point, white point, and midtones, too.
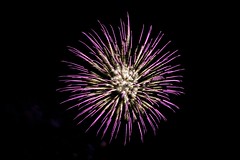
A heavily saturated fireworks picture.
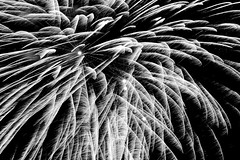
A black and white edited fireworks picture.
As my final tip, practice makes perfect! If you’re lucky to live in a place with fireworks shows all over the area, take advantage of them and hone down your fireworks photography skills! Since I live in the great city of Dallas, there were plenty of opportunities for me to take fireworks pictures and not all of them were happening at the same time. Market Street Allen USA Celebration was exactly one week before July 4; Kaboom Town was the day before Independence Day. Even though I only attended two fireworks shows, I feel like my photography skills have improved. If you want to see my exif data of my fireworks photos, feel free to check out my Flickr albums for Market Street Allen USA Celebration and Kaboom Town. Do y’all have any other tips for fireworks photography? If you used some of my photography tips, I’d love to see your end result! Good luck!
