
*So it’s only $35 if you’re making a twin-sized headboard. But even if you sleep on a bigger bed, you’ll be saving more money.
Store-bought headboards are ridiculously expensive, in particular, this headboard I modeled my DIY headboard after. Come on; your bed is supposed to used for sleeping and I doubt people push their heads against the wall while they sleep. I mean, I survived without a headboard my whole undergraduate career. It wasn’t until I realized that I wanted to feel more comfortable while reading or using my laptop in bed that I wanted a soft headboard.
After the initial sticker shock, I came to reason, “It’s only a slab of wood with a piece of fabric on top, right?” So I decided to make one of my own. After a quick Pinterest search, I found out that a DIY headboard is actually a slab of wood, a piece of fabric, and some batting. Nevertheless, the only shock I have now is how I only spent $35 and just a few hours on my headboard.
- Measure how big you want your headboard to be. I wanted my headboard to be exactly a yard wide, but even if you have a twin bed like me, your measurements still might be different. A yard is actually three inches shorter than the standard size of a twin-sized bed, however, it was fine for me because my bed frame is invisible underneath my mattress. If you have a substantial-sized bed frame, you may need adjust the size of your headboard so that way your headboard doesn’t look tiny in comparison to your bed frame.While the width of your headboard is based off your personal preference, I recommend that you do not make your headboard taller than a yard. This is due to fabric width restrictions. You can almost get an unlimited amount of yards in length from a bolt of fabric, but “the width of a bolt is usually 45 or 60 inches.” Additionally, you need the few extra inches of fabric to wrap behind your headboard so you can staple it. More so, a yard-high headboard may be too tall for your taste anyway.
- Buy the wood. Although wood is more expensive than foam board and cardboard like I’ve seen some DIY headboards use, I think those items are too flimsy. So I bought my wood at Home Depot where you choose from a selection of giant wood sheets. I recommend getting a sheet at least half an inch thick. You’re going to be leaning on your headboard and even though it will be covered in batting and fabric, I wouldn’t take the chance of it snapping in half. As for the type of wood, get the cheapest half-inch sheet you can find; I just got one in plywood. The day I went to Home Depot, I got it cut in store for free, yet that may not be the same for everyone. Additionally, since it was my first experience getting wood, I didn’t know that you were supposed to get a receipt from the cutter to show the cashier. The cashier was very nice and decided to just charge me half the price of a full sheet, which ended up being around $10.

Even having just the wooden board at the edge of my bed already makes my bed feel bigger and more homey!
- Buy the rest of the materials. For every other material, I bought at Hobby Lobby and Jo-Ann’s. The only way I got my total cost of materials at $35 is because of the coupons these stores had. The catch of using a 40% or, if you’re lucky, 50% off coupon is that it can only be used on a single regular-priced item. There is a way around this though. You don’t get a unique coupon code so you can actually use it multiple times. Therefore, you can go to a Hobby Lobby or Jo-Ann’s of a different location and grab another item off your list. Continue going to different locations until you get all the materials you need. If you don’t live in an area with multiple craft stores, just go grab the next item on your list the next day. Or if you’re really lucky, your craft store won’t care; once you finish buying one item in one aisle, you can go to the next aisle and purchase your next item.
- Buy the batting. If you’re not a quilter, batting is what is used in between the two fabrics to make it soft. (Fun fact: I’ve actually made a quilt as a baby gift three years ago. Maybe one day I’ll write a blog post about that too, if I can remember how I did it. 😛 ) I bought two of these because it was the thickest batting and the crib size matched my headboard perfectly. Make sure the size of your batting is at least nine inches longer than your board both in length and width so you can easily staple it to the other side, especially as your board gets thicker. You may be able to get away with a shorter allowance, but since the shortest side of the batting I bought was 45 inches and my board was 36 inches on all sides, well, do the math and you get a nine-inch allowance. Anyway, I went to two different Jo-Ann’s and used my 50% off coupon on both of them–two battings for the price of one for $17.99! Additionally, when I went to Jo-Ann’s at the time, they also had a sale for 50% all batting by the yard if you’re more into that.
- Buy the fabric. I recommend not getting a fabric that’s super stretchy that may pull apart while trying to staple it. Besides that, it’s up to you what you get. I got a duck fabric with a yellow and white striped pattern that only cost $8 after a 40% coupon at Hobby Lobby.
- If you don’t have fabric scissors (regular scissors would be okay, too), an iron, or a staple gun, get those as well. I already had fabric scissors and an iron, and I borrowed the staple gun so that didn’t add to my total cost of this project.
- Wash the fabric. I learned that duck fabric is second after leather for being the toughest wearable fabric so I needed to wash it to make it softer.
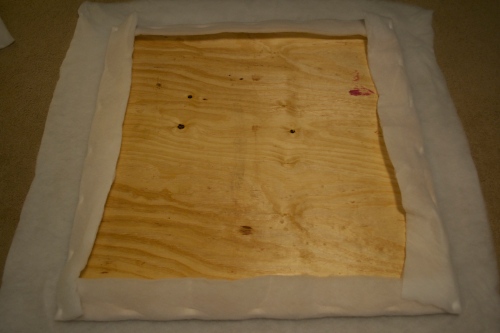
- Lay down the wood, lay down the first layer of batting in the middle on top of the wood, and iron the batting on top of the wood. Make sure your iron setting isn’t too hot and and it’s not on one area of the batting for more than a short time.
- Flip the board over, trim the corners, pull the batting tight, and staple the batting on the back of the board. Be careful that you don’t mess up the batting’s center position. I just stapled the batting every few inches or the width of my staple gun. Additionally, the importance of trimming the corners is so they don’t get too thick for the staple to go through, especially when you add the second layer of batting. However, don’t trim the corners too close or right at the edge because you still want to be able to staple the batting behind the board.
Here’s how I spaced out my staples.
- Repeat the previous two steps for the second layer of batting. I recommend stapling the second layer of batting in between the staples you made on the first layer of batting so that way your staples on the second layer go through.

Here’s how I trimmed the batting at the corners, making sure there weren’t more than two layers of batting anywhere around the wooden board, yet still having room to staple the batting down.
- Lay down the wood, lay down the fabric in the middle on top of the wood, and iron the fabric on top of the wood. If you bought a patterned fabric, specifically one with straight lines like mine, be extra careful to make sure your pattern is centered.
- Flip the board over, trim the corners, pull the fabric tight, and staple the fabric on the back of the board. It’s especially important in this step that you make sure that you pull the fabric with the same amount of force on each staple, otherwise, your pattern will be off centered. Additionally, I recommend stapling at least wherever the pattern repeats itself; sometimes the staple will pull your fabric a little too tight and you at least want the puckering to happen evenly.
- Place your headboard on top of your bed frame and give it a little slant in between the wall and your mattress. My headboard stood up without needing any additional help and hopefully yours won’t either! If there was going to be a problem getting it to stand up, I thought about adhering Command large picture hanging strips to my headboard and the wall.


The only con I have about the headboard I created is that I wish I could have added more layers of batting to it, but it would have gotten too expensive and possibly too thick for the staples to secure to the wood. Otherwise, it’s still comfy to lean my head against while writing this blog post. 😉 Additionally, it makes my bed feel bigger and decorates my otherwise bare wall! What I am most proud of my DIY headboard, though, is how much money I saved compared to if I had bought the headboard already completed!
There are just so many reasons on why I love my DIY headboard! That being said, I’m so excited to see your own DIY headboards! Also, if you have any tips to add onto to mine, I’d love for you to share them, too!
